Japanese sword forging and polishing

6
Folded Steel-the making of a Japanese sword
In this article we will begin to look at the process of making a Japanese sword or Katana including the final stages of forging and polishing. In these times of government encroachment in the area of owning a ‘Samurai sword’ I thought it might be usefull to look at the creation of a work of art that also happens to have a combatative use. Today that use is usually confined to Iaido, and Kendo dojo-but historically the Katana served the Samurai both on the battlefields of Japan and for personal defence. The photographs of the forging process were taken in Gifu in central Japan, and the lovely finished blades were photographed at the museum next to the shrine.
The process of forging a Japanese sword is quite complex-especially the metallurgical side of things. If anyone is interested in the metallurgy I suggest the book by Leon Kapp titled ‘The Craft of the Japanese Sword’. Also usefull is the book titled ‘The art of the Japanese sword’ by Kunihira Kawachi.
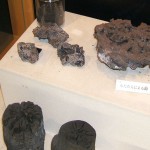
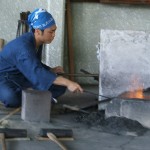
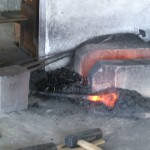
Before the smith who is usually an ordained Shinto priest gets to work with the Tamahagane steel it has to be smeltered from the raw iron ore. Pics 1 and 3 show this. The ore is crushed, broken apart and sized initially. The pieces are then selected by the smith and sorted. There are a number of factors involved in the sorting of ore pieces, but the most important is the division into softer low carbon pieces for the core of the sword known as shingame, and the harder pieces used for the outside, edge and jacket-known as kawagane.
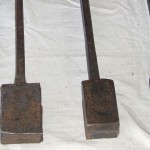
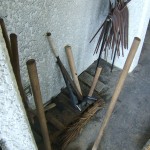
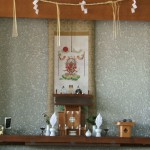
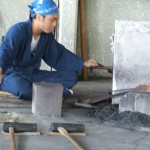
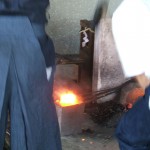
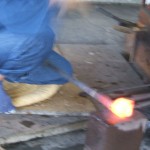
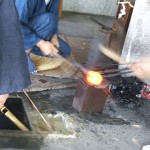
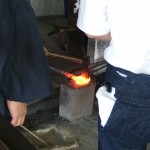
Pieces are then put on the handle,(pic 2) heated in the forge, and hammered together, after been folded. The forge is a sacred place with it’s own shrine where the master swordsmith and his apprentices will work on bringing the forge up to around 1300c (pic 6)using charcoal and hand operated bellows.(pic 7) Pic 4 shows some tools while pic 5 shows the smiths shrine. Two blocks are usually assembled in this manner-although sometimes a more complex blade construction is used. The block is hammered by the apprentices, with the smith usually using a smaller hammer to make minor corrections. He also cools the block with a special clay slush(pic 9), and rolls the block in hay to add carbon as needed. When the block has been hammered flat(pics 10, 11, and 12) it is folded in two and then hammered again.(pic 13) This process is completed around ten times to make a many layered blade. The jacket kawagane is beaten in to a ‘U’ shape so that the core ‘shingame’can then be hammered inside.
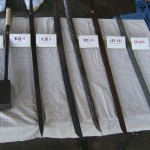
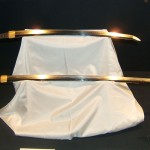
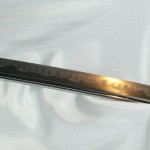
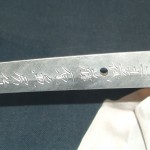
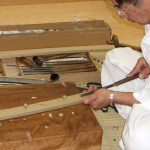
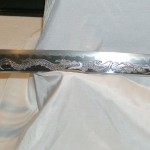
The block is then beaten into a sword shaped rod and the shinogi(ridgeline) and kissaki are beaten in. At this stage shaving planes or sen are also used to correct the shape of the blade. Clay is then added to the edge of the blade prior to heating and quenching to produce the hammon(line between the cutting edge and shinogi). The hammon is produced as the clay absorbes much of the heat along this edge leading to a different carbon content of cutting edge and blade. This has the effect of making the edge harder, and the blocking surface cofter and less likely to break. It is interesting to note that the classical warrior preffered a straight(suguha) hamon close to the edge of the blade as this led to less weak points along the edge of the blade. For further information on blade preferences I advise Otake Risuke’s ‘Katori Shinto ryu’.The flowery hammons do look nice though! Pic 14 shows some blades during the different stages of production. Pic 15 shows a lovely finished blade in the museum, whilst pic 16 shows a fine hammon close up.
In this next section I will examine the final stages in the production of a Katana, from when the smith passes the blade to the polisher.
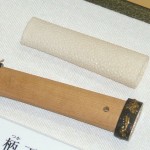
Usually the smith passes the partially polished blade to the polisher prior to marking and signing the tang.(pic 21)
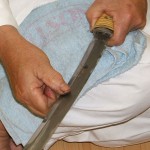
The polisher then begins the laborious task of polishing the blade. Firstly stones are used to polish the blade surface gradually becoming finer in their coarseness. There are usually between five and nine stones, with many speciality and artificial stones available. Course Ara-to,Omura-to and Ao-to are used for groundwork polishing. Bunsuido is followed by Kasei do, which is followed by Chu-nagura, and then Koma, followed by Suita-do and Uchigumori. Suita is especially for making the grain stand out. There are anumber of artificial replacement stones known as Kaishin,Asahi, ans Shin asahi-do. Pics 17 and 18 show a polisher at work with polishing stones.
Next small pieces of stone known as Hazuya and Jizuya(pic 20 shows these) are used to bring out the Hammon and grain respectively. These pieces are often laquored with tanned Yoshino paper to stop them crumbling. The Hazuya and Jizuya come from Uchigumori koppa and Narutaki Koppa. Once the small stones have begun to finish the polishing process a number of other compounds are used to bring out the grain and hammon. These include Jittekou powder which is mixed with Subakiyo and applied to the blade surface with cotton wool. Uchiko powder is used before the blade is finally oiled and passed to the other craftsmen. Not all of the blade is polished in this way. A number of burnishing tools and compounds such as Tsunokou are used on the mune, as well as the Hi, and to differentiate lines on the blade such as the Yokote which divides the Monouchi from the kissaki.
The habbaki can now be added to the blade,(pic 22 shows a craftsman at work) and horimona may be added too(pic 27), before the blade is passed back to the smith for tang finishing, and signing.
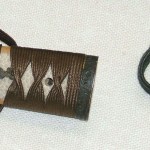
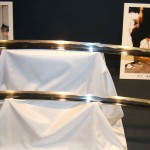
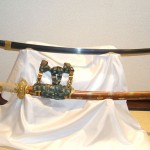
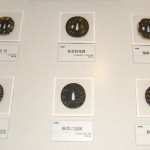
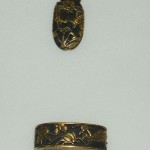
Once the blade is finished the saya(scabbard) is constructed by another craftsman(pic 23 shows this craftsman at work). Next the tsuka(hilt) is constructed and the sword furniture is added prior to binding.(pics 24& 25 show this process) Sword furnishing includes the tsuba(pic 31), Fuchi/Kashirae(pic 34), menuki, kojiri, seppa, kuzoka/kogai,(pic 30) and various shitodome. The whole saya needs to be deeply laquored to set off and strengthen the scabbard. Pics 28 and 29 show lovely finished katana and tachi blades.
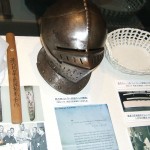
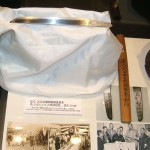
The process is a long one involving many skilled craftsmen, and I have summarized certain aspects of the process as this article seeks to be an introduction. The best English language book on polishing is Leon Kapps book titled ‘Japanese sword polishing’. Pics 32 and 33 from the Gifu museum are interesting as they show a forged tanto blade which was presented to Hitler during WW2 as well as a German helmet gifted by Hitler and a bowl given by Mussolini to the Japanese government in exchange. The final pic shows the author with the worlds largest (4M+) folded steel katana.
-

- 1
-
- 2
-
- 3
-
- 4
-
- 5
-
- 6
-
- 7
-
- 8
-
- 10
-
- 11
-
- 12
-
- 13
-
- 14
-
- 15
-
- 16
-

- 17
-

- 18
-

- 19
-
- 20
-
- 21
-

- 22
-
- 23
-
- 24
-
- 25
-

- 26
-
- 27
-
- 28
-
- 29
-

- 30
-
- 31
-
- 32
-
- 33
-
- 34
-

- 35
